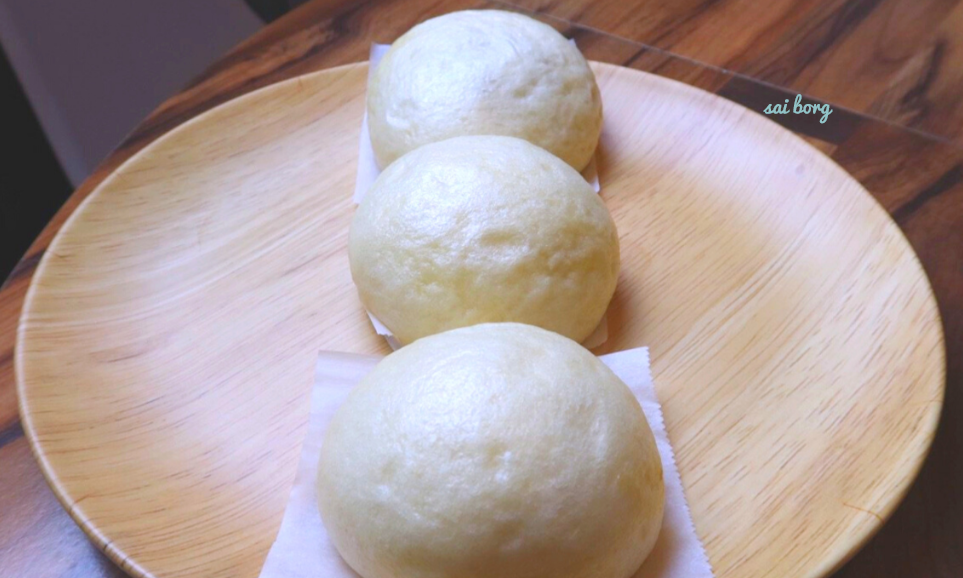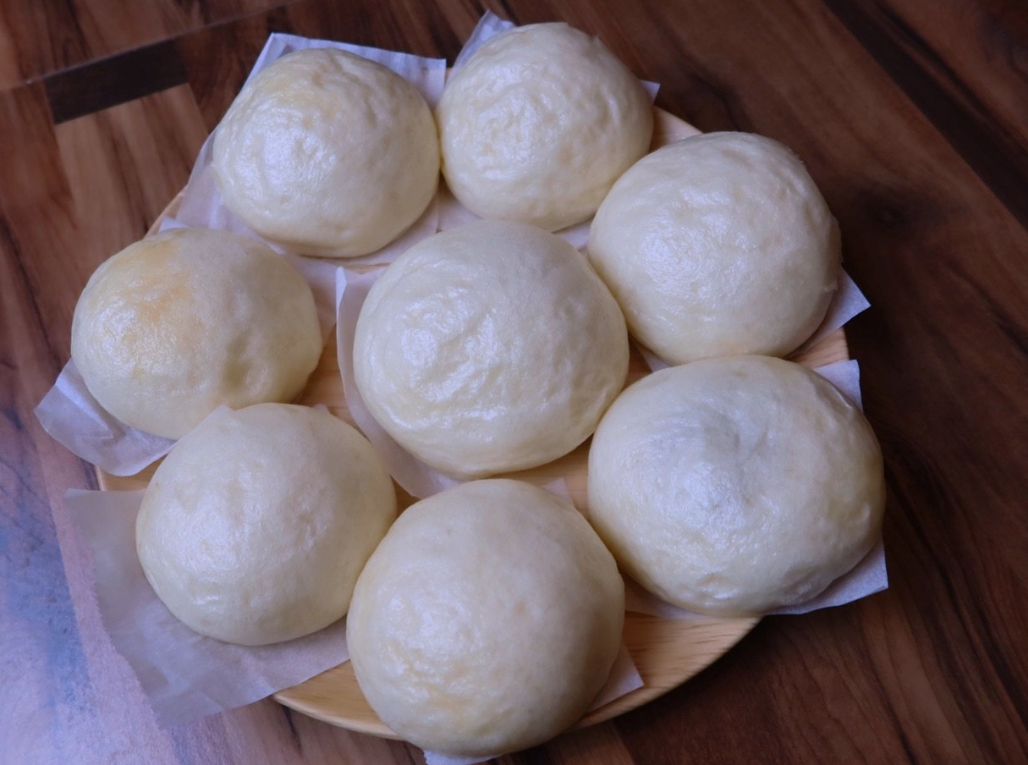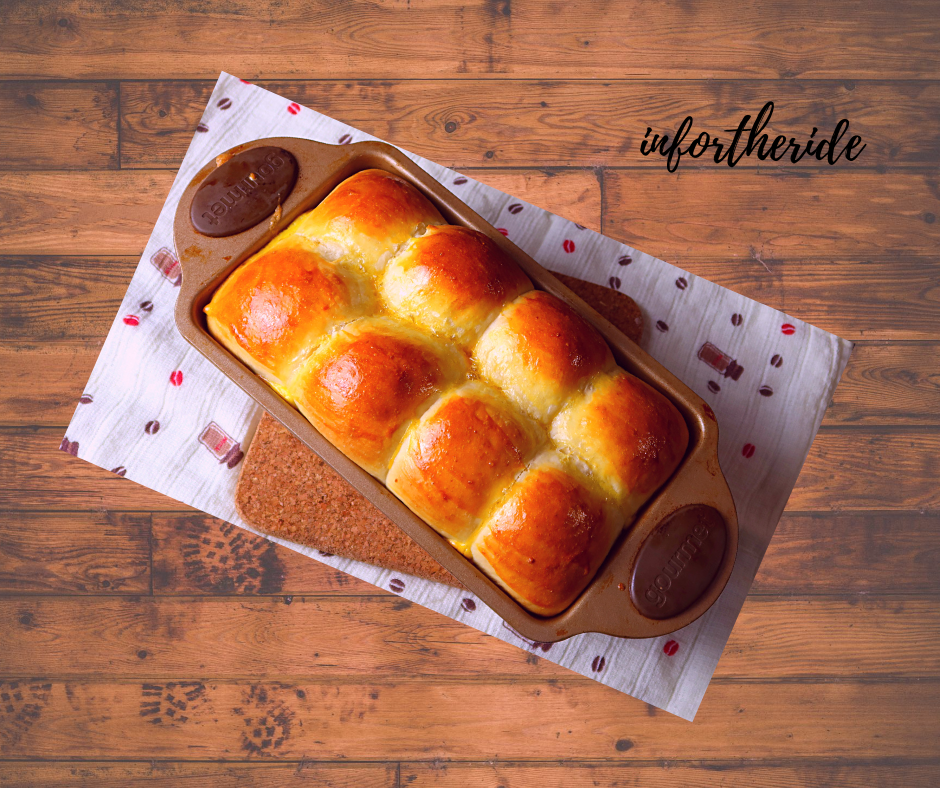
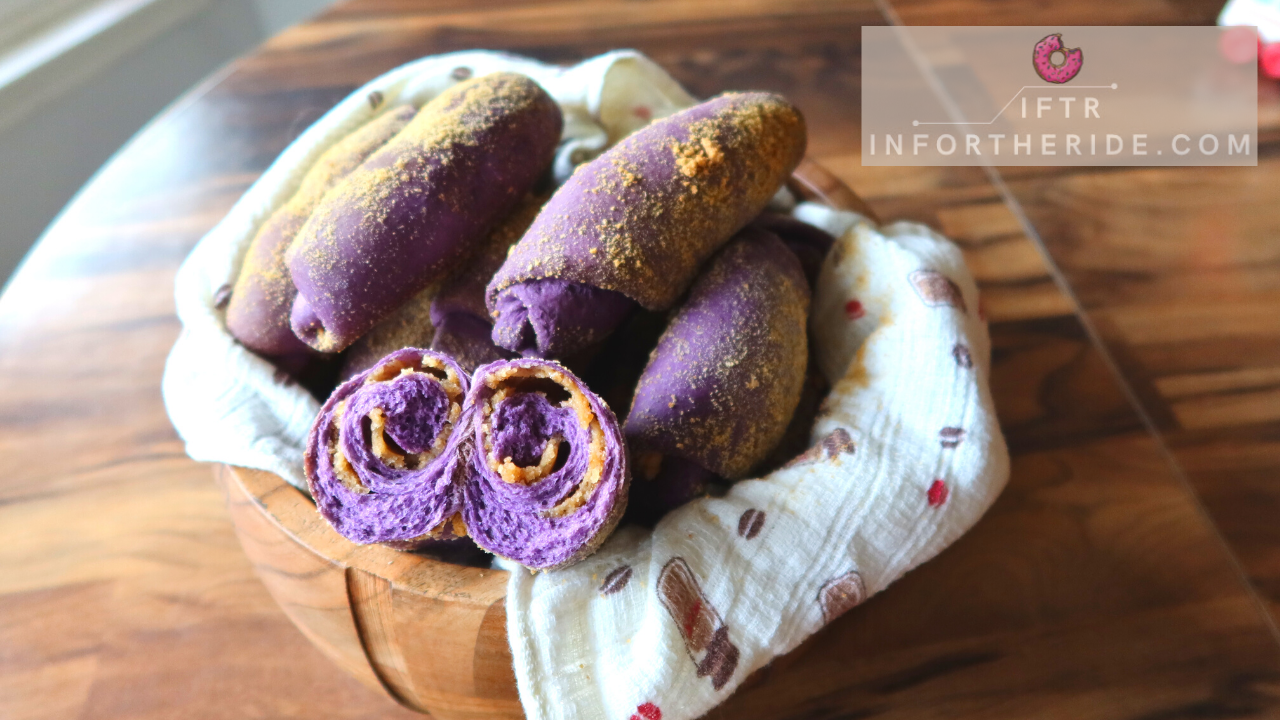
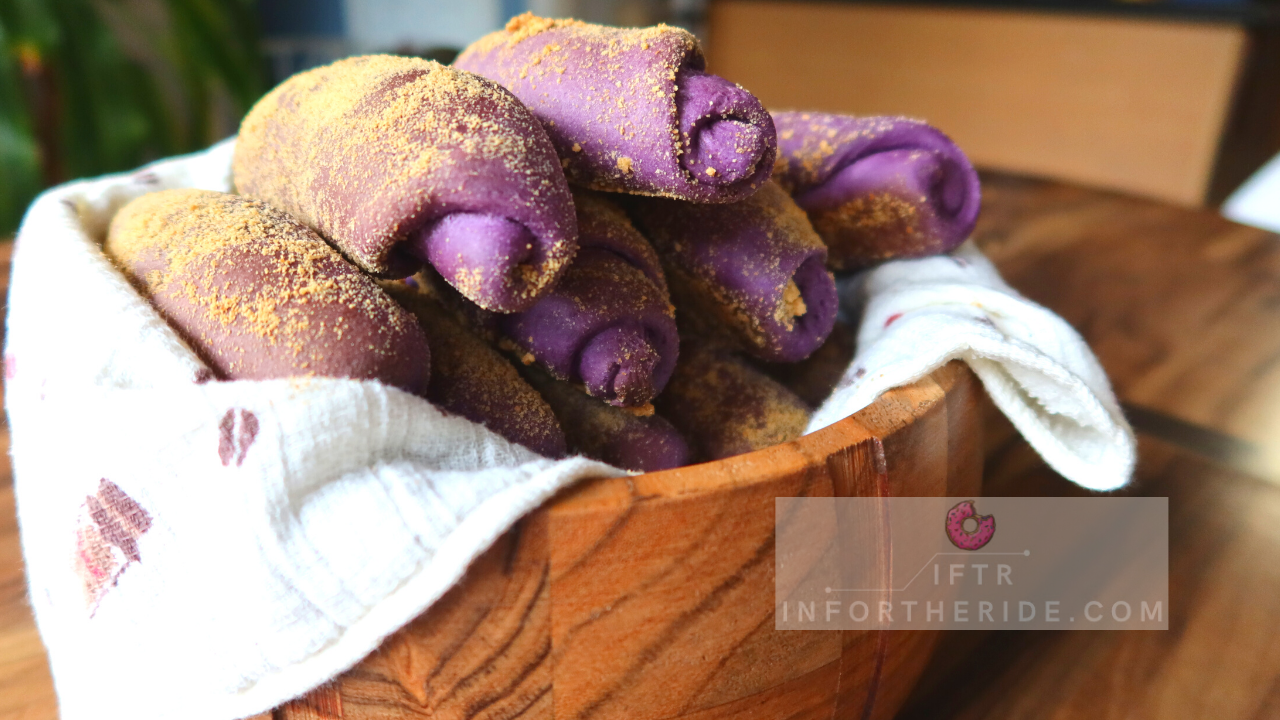
ube spanish bread
6 Dec 2020
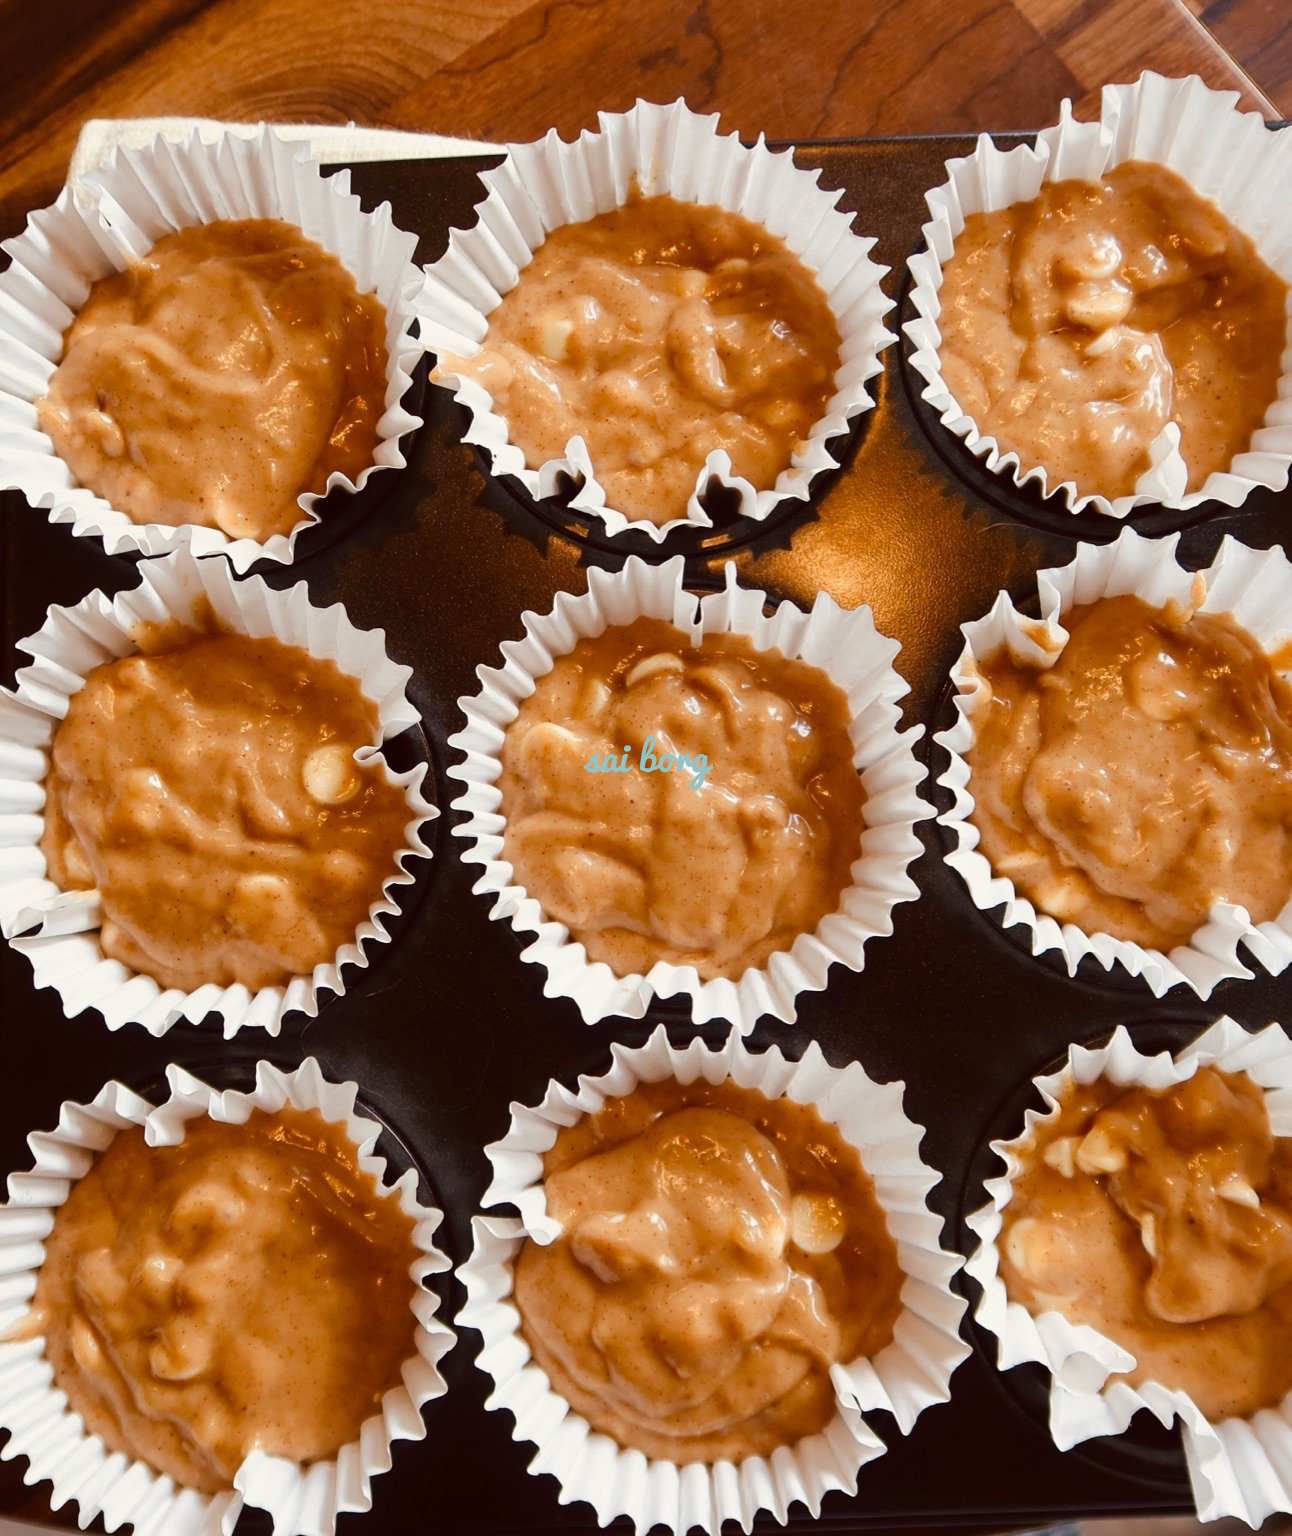
ube flavor has becomes huge part of the filipino baking culture, i have made spanish bread of course, but today we will add a twist to it, let's make an ube spanish bread. :) things to note, make sure you use ube flavor and not ube extract.
ingredients:
for the dough
- 1 cup lukewarm milk (about 110-115f)
- 1 tbsp granulated sugar
- 2 1/2 tsp instant dry yeast
- 3 cups all purpose flour (more for dusting)
- 1/4 cup granulated sugar
- 1 tsp salt
- 1/4 cup melted butter
- 1 egg
- 1 tsp ube flavor (make sure it is ube FLAVOR and not ube EXTRACT, they are two completely different)
- bread crumbs
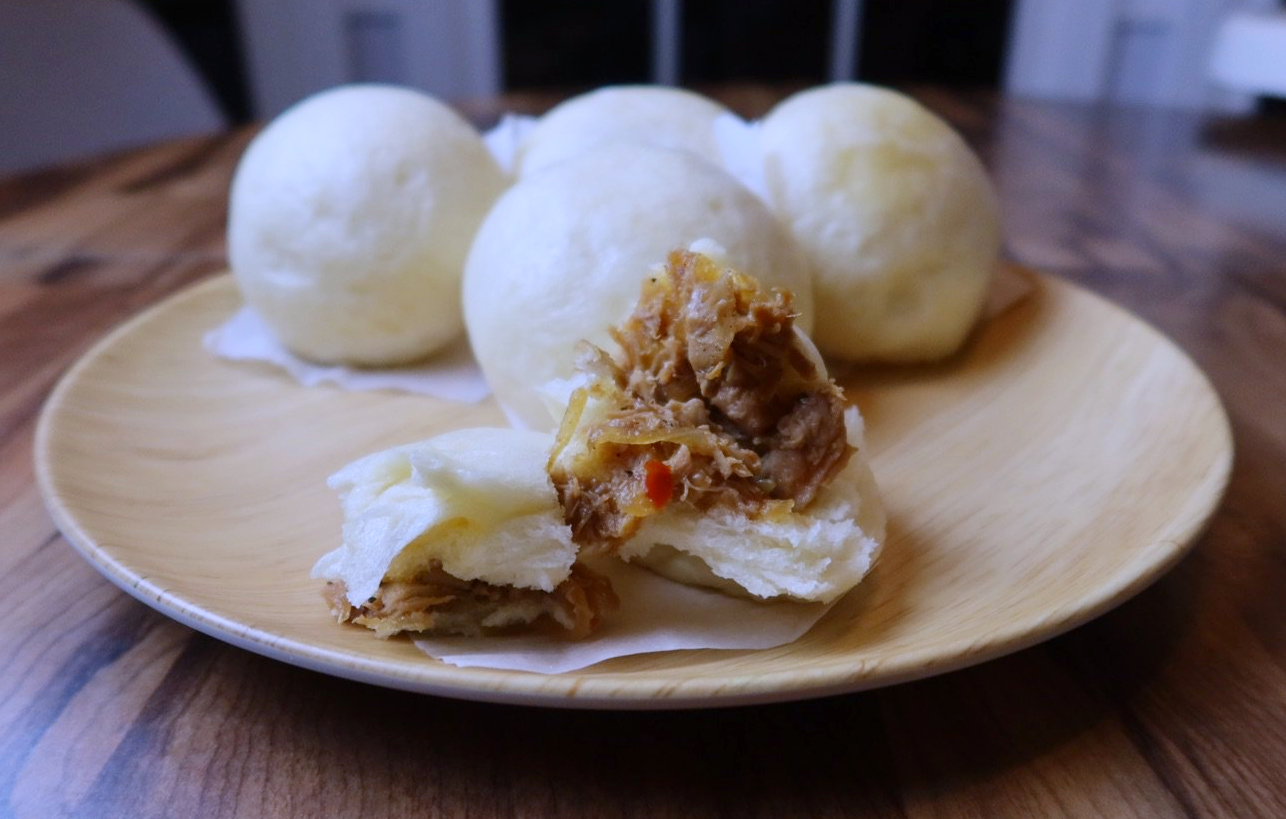
for the filling
- 4 tbsp butter
- 4 pcs crushed graham crackers
- 1/4 cup milk
- 1/4 cup flour
- 1/2 cup sugar
directions:
- into your lukewarm milk, add 1 tbsp sugar and stir
- then add the yeast and stir. set aside. let the yeast rise for at least 8 to 11 minutes
- into a mixing bowl, combine flour, sugar and salt
- add the melted butter, the yeast mixture (make sure the yeast has risen), the egg and mix all together
- add 1 tsp ube flavor and continue kneading the dough until smooth. if the dough is sticky add flour a tbsp at a time, if the dough is hard add water a tbsp at a time
- shape the dough into a ball. place in an oiled bowl
- cover with plastic wrap and let the dough rise for about 1.5 to 2 hours or until the dough doubled in size
- while the dough is rising, cook the filling
- heat the pan then add the butter
- add the graham crackers and the milk and stir
- add the flour and sugar and continue mixing until it turns into pasty consistency
- turn the heat off and let the filling rest
- once the dough is ready, deflate the dough and move into a floured surface
- divide the dough into 4 equal portions
- roll the dough into a log and cut into equal parts, i was able to make 16 pcs, you can make the bread larger size if you want to
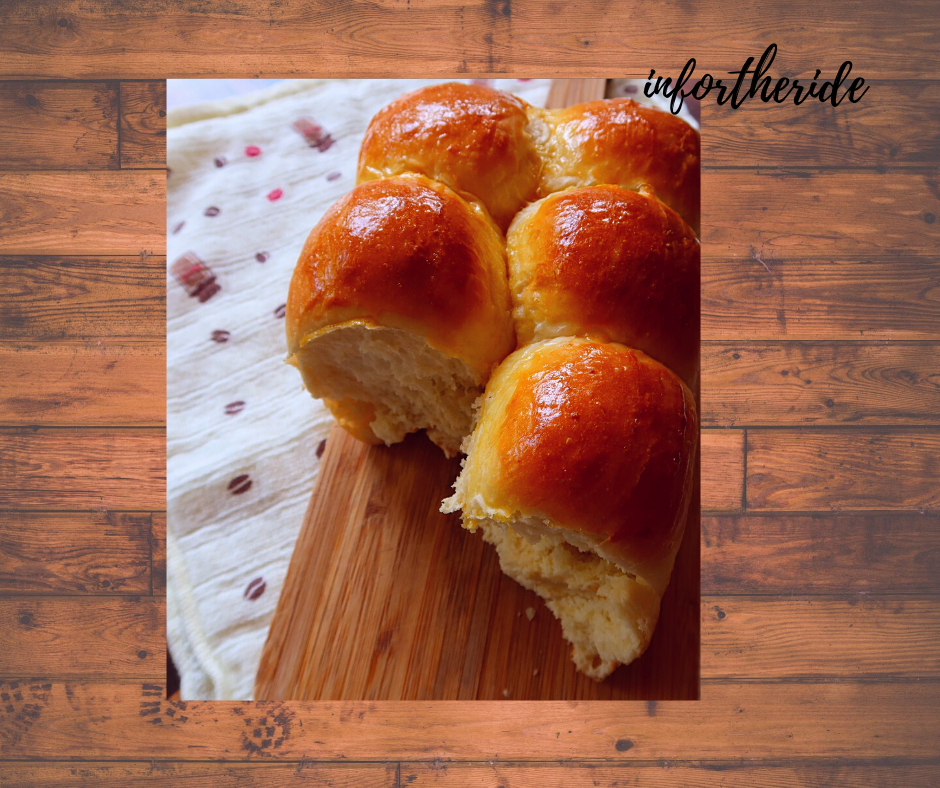
- flatten the dough and then spread filling in the middle leaving spaces on the sides
- roll the dough and repeat the process until you finish
- roll the bread into a plate of bread crumbs
- place the bread into a lined parchment paper baking pan
- cover the bread and let the bread rest for another 30 minutes
- set the oven temperature to 350f
- and bake the bread for 18 to 20 minutes
- and enjoy!
like any other bread, this one is also good to dip in the coffee! yum!
good luck and please don't forget to shar, and let me know if you end up making this bread! see you next time!
xo,s
- Read more about ube spanish bread
- Log in or register to post comments